File Preparation Checklist
Follow the below order of checks when preparing files for laser cutting;
Before checking your file, dFab recommends changing your workspace view to Essentials Classic.
Window> Workspace>Essentials Classic
Colour Mode: RGB
Change the colour mode to RGB
File>Document Colour Mode>RGB Colour
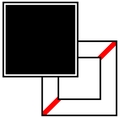
Function Colours & Stokeweights
Select all Objects
Ctrl+ARecolour
Edit>Edit Colours>Recolour Artworkor select the recolour artwork iconSelect
Advanced Options...Double Clickthe new color swatch to edit a colourModify the colour value and cilck
OkWhen all colours have been corrected click
Okto save.Select all black fills or objects intended to be etched. (if no etching is required, complete steps 10 and 11 only)
Select>Select SamemenuThese objects can then be hidden
Object>Hide>SelectionorCtrl+3Select all remaining objects
Ctrl+AChange stroke weight to 0.01mm
Show all objects
Object>Hide>SelectionorAlt+Ctrl+3
If colours other than Red, Green, Blue or Black are present in the document they will need to be located in the file and converted to the correct colour value or alternatively, deleted.
These can be located quickly by using the Select> Select Same menu
Groups
Select all objects
Ctrl+AUngroup Objects
Object>UngrouporCtrl+Shift+GContinue until no groups remain
Clipping Masks
Select all objects
Ctrl+ARelease All Clipping Masks
Object>Clipping Mask>Release
If clipping masks are present in the document, further modification may be required before proceeding.
Artwork Position
Move artwork within artboard or resize artboard using the artboard tool
Shift+O
An illustrator artboard should not exceed the laser cutter bed size (800 x 500 /1000 x 700) Ensure all artwork is placed within the usable dimensions of the material loaded in the laser cutter
Floating or Stray Points
Select>Object>Stray PointUse
Del/Delete/backspaceto delete stray points
Dashed Lines
Dashed line types are not supported by the Epilog print driver. This means all paths will need to be converted into individual line segments.
dFab recommends doing this in your CAD software of choice or using the below breakDashes script in illustrator.
Downloading & Installing
Close Adobe Illustrator
Download and Unzip
breakDashes.zipMove breakDashes.jsx to ... >
Program Files>Adobe>Adobe Illustrator [20..]>Presets>en_Us>ScriptsOpen illustrator. The script should now be available under the
File>ScriptsMenu
Running Script
Select all dashed lines within the document
If selecting multiple,
Select>Select Same>AppearanceRun Script
File>Scripts>breakDashesUngroup all objects
Object>UngrouporCtrl+Shift+G
Duplicates
Duplicate Engrave paths may result in a cut rather than a surface engraving
Duplicate Cut paths have a significant risk of fire as the laser will fire directly into the vector, potentially igniting debris already in the laser tray.
If a significant number of duplicate objects are present, we recommend using Rhino to consolidate objects and remove duplicates.
If there are a number of overlapping or intersecting unjoined lines in illustrator, the shape builder tool can be used to construct continuous polygons.
Text
All text should be converted to vector objects
Type>Create OutinesorCtrl+Shift+OThis text can then be ungrouped,
Object>UngrouporCtrl+Shift+G
If you are unsure if your file has been created correctly, ask a dFab staff member to review your work. The majority of laser cutting issues originate from incorrect file setup.
Last updated